 2
2
 3
3
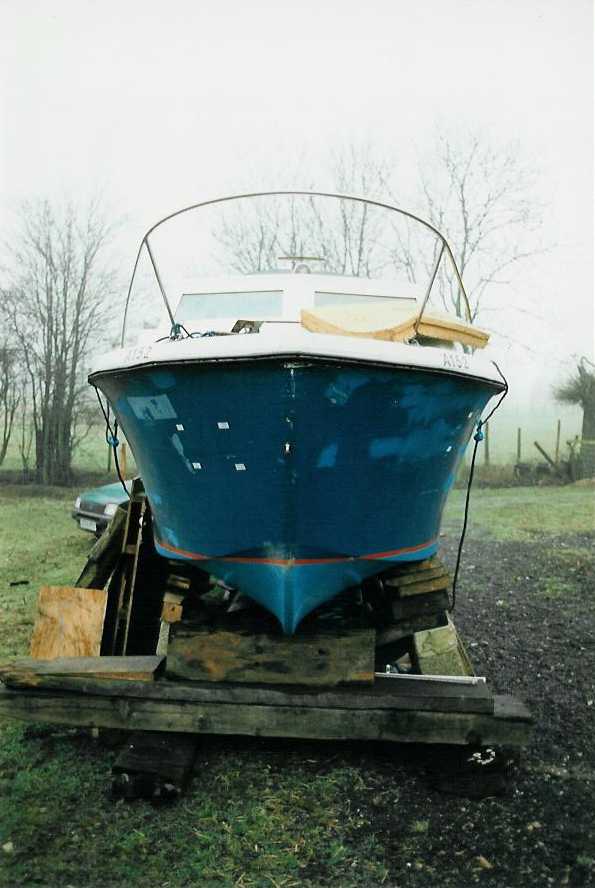
Snapdragon.
OF SAWLEY.
How I rebuilt a Norman 23’.
The story behind my interest in boats and boating starts in 1992, whilst I was still in the 6th form at school. Some friends of mine had decided to have a mid-week break on the Norfolk Broads to celebrate finishing school. I was asked if I would like to go with them. Money was tight for me then, I think it was about £60 each for the 4 days, Friday-Monday, but I wanted to go. We hired Belmore, a Princess 30DS from Moores of Wroxham in September 1993. We all had a great time, and I was hooked!
The next year, 1994, a slightly different set of friends and myself and hired Hastings Castle, a Westward 38 from Castle Craft of St. Olaves. This time for a full week, and again, we all had a great time. Earlier that year a close friend, Andrew, and myself visited the Nottingham Boat Show. Here we saw a Sovereign 34 called Chardonnay.
In December ’94 I was browsing magazines in a local shop and spotted Chardonnay on the front cover. I flicked through what was December ’94 Motor Boats Monthly and bought it. The start of a continuous subscription. I also take Motor Boat & Yachting and Canal Boat & Inland Waterways.
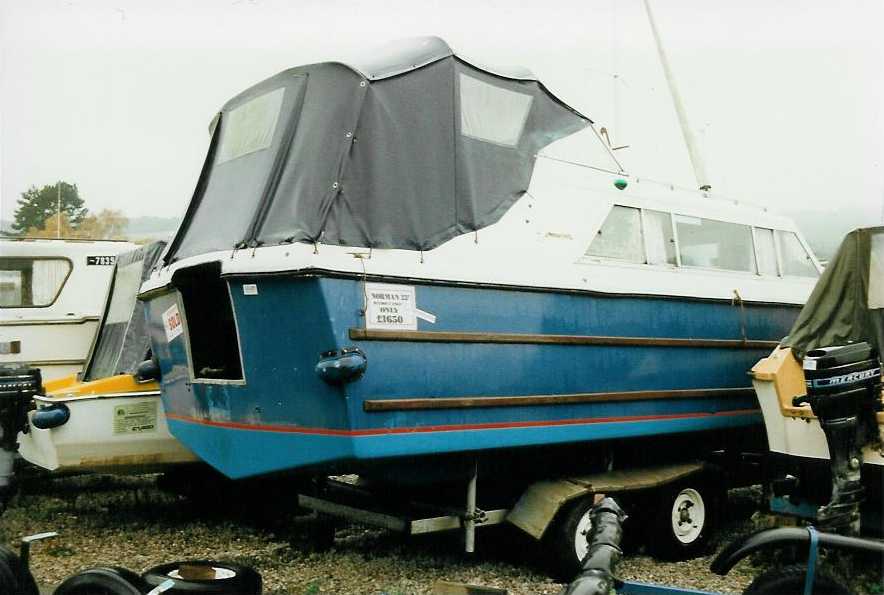
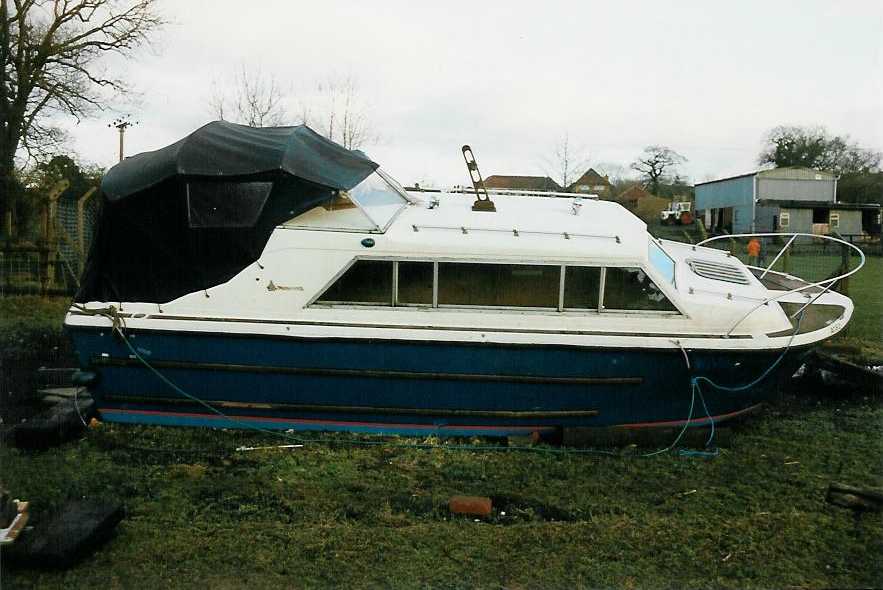
Late in ’95, I was on the train between Sheffield and Chesterfield, and spotted loads of boats stored near the railway. When I got home I looked on the map to see where they could be. It turned out to be Nationwide Boat Sales. I jumped in the car and tried to find them. Tucked in the top corner, the cheapo section, was a tatty Ormelite. The interior was very nice though. It was for sale at £999! As we had both said that we would like to have our own boat of some sort or another, I thought Andrew and myself could afford this as we now had half decent jobs. I went around to Andrews and told him of the cheap Ormelite. We went back the next day to have a look. It was sold! While we were there we had a look around and came across a proper looking boat that was for sale for £2950 with a fairly new Honda 8hp. There was the option to buy it for £1650 without the engine, so we went home having paid £5 each deposit! I went back a week later with £100 deposit, and she was ours.
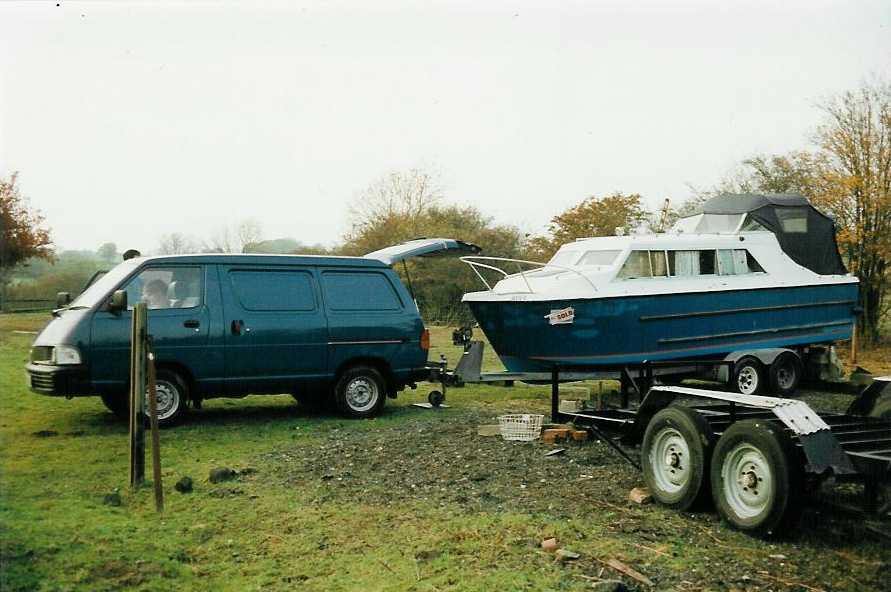
Now we had to find somewhere to put her to do some tidying up. Andrew knew someone in Mansfield with a space at the side of their house. A quick phone call and we could put her there while we did her up. When the time came to take her, my father has a van that we knew could tow a ton and half, we took her to the allotted house. We found we couldn’t swing the trailer around enough to get it round to the side of the house!
We now had a boat that we had now bought, stood on a trailer that we had only hired for a week, and nowhere to put it. Luckily, Andrews father knew someone with a 4 acre smallholding, so another phone call and we were off back Chesterfield way, to Tibshelf. A few hours later, we were taking the trailer back, having got our boat stood on bits of railway sleeper and many breeze blocks.
1
2
3
4
 5
5
 6
6
7
 8
8
 9
9
10
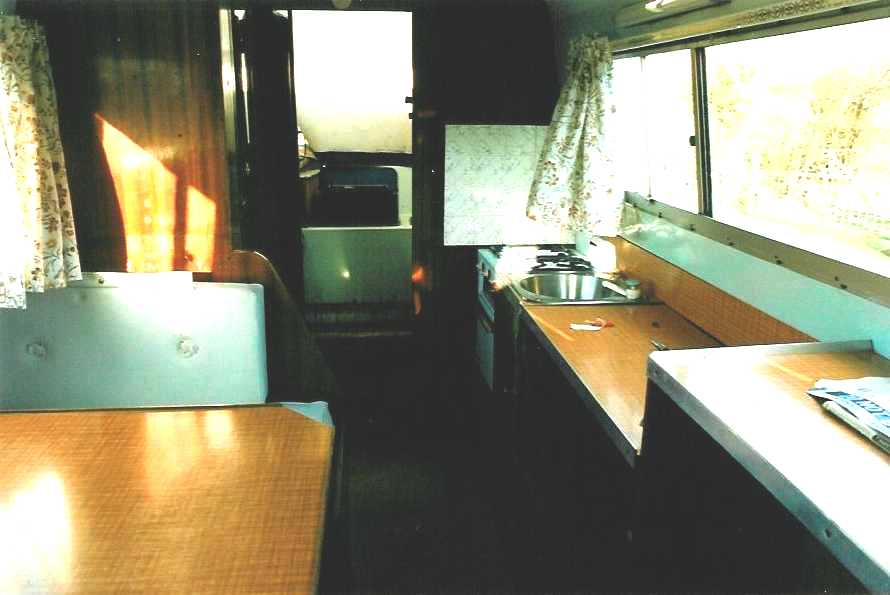
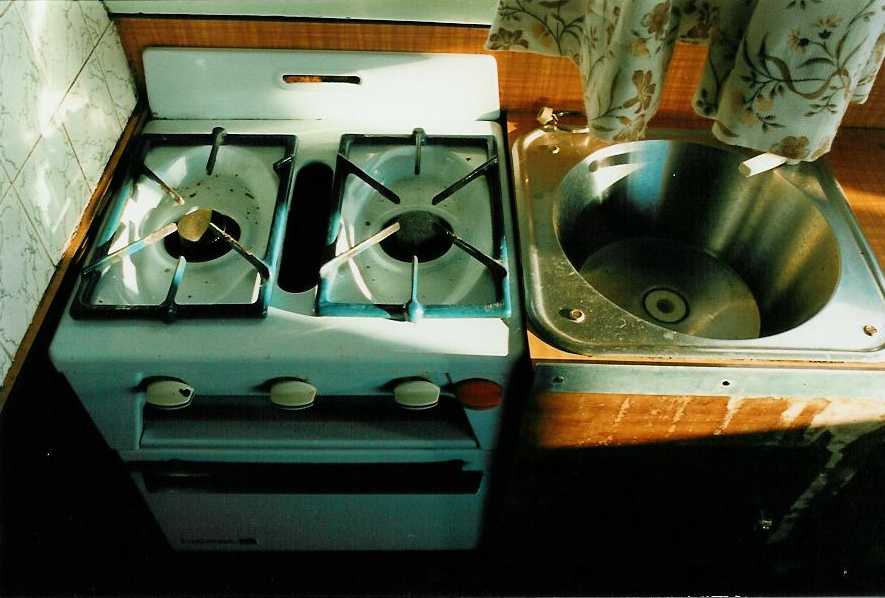
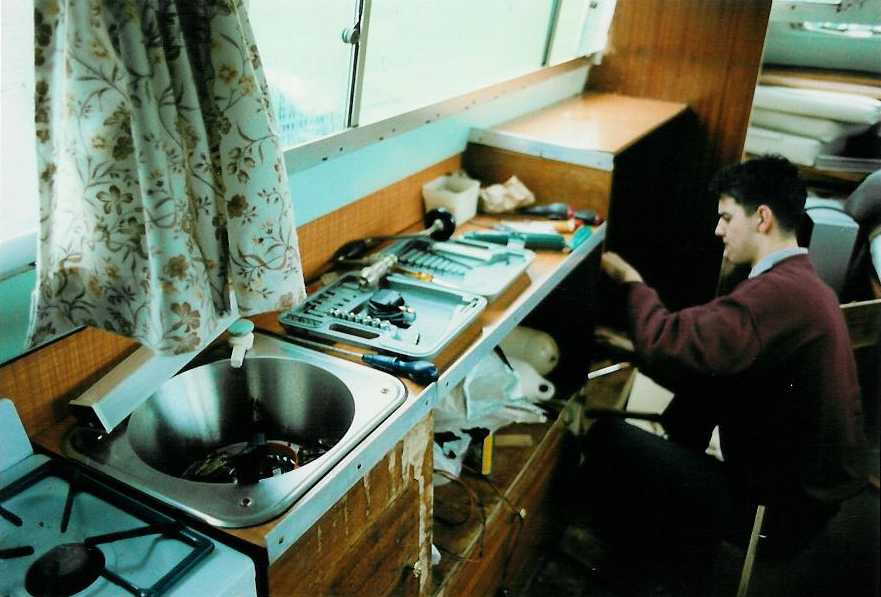
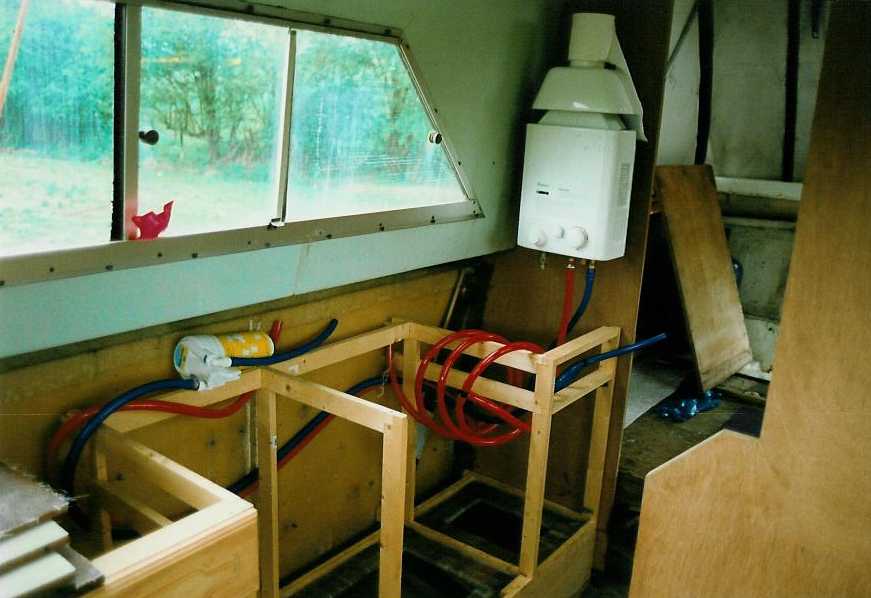
We soon decided that we would like a few home comforts, toilet, hot & cold running water, a proper shower, etc. The original plumbing was the probably standard pump tap from a grey plastic tank under the cockpit floor.
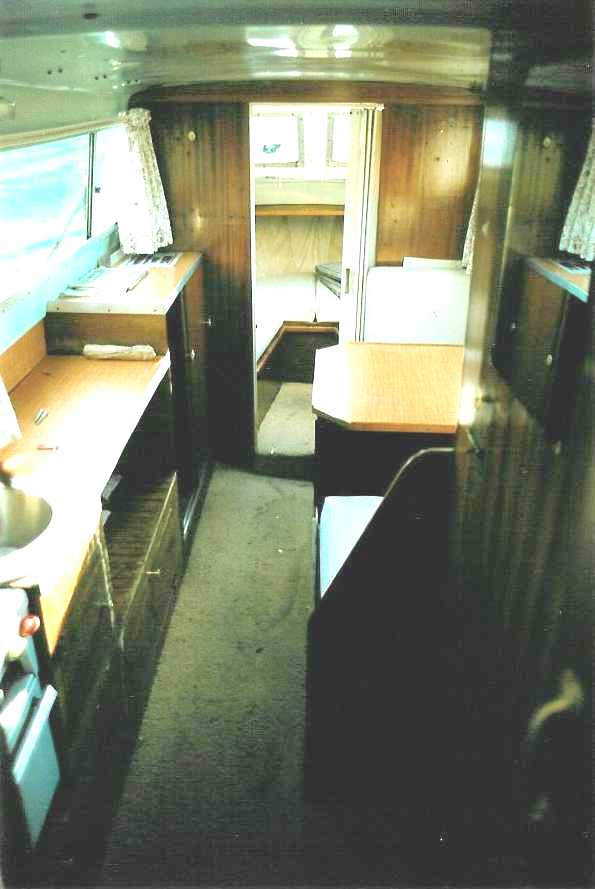
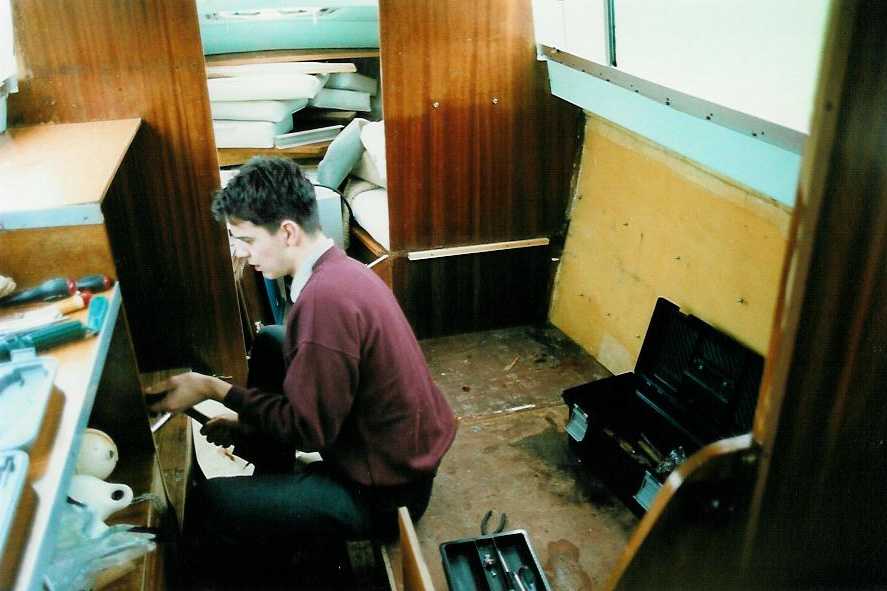
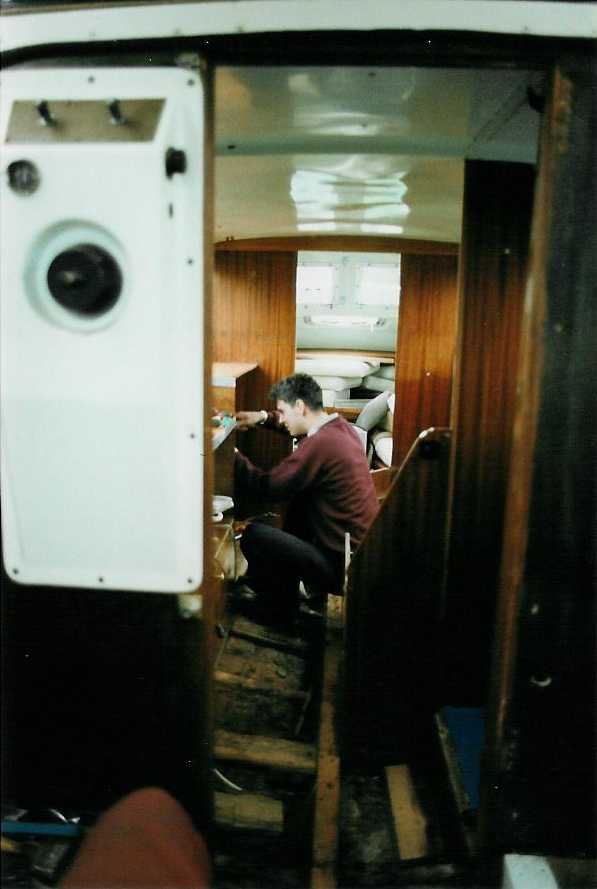
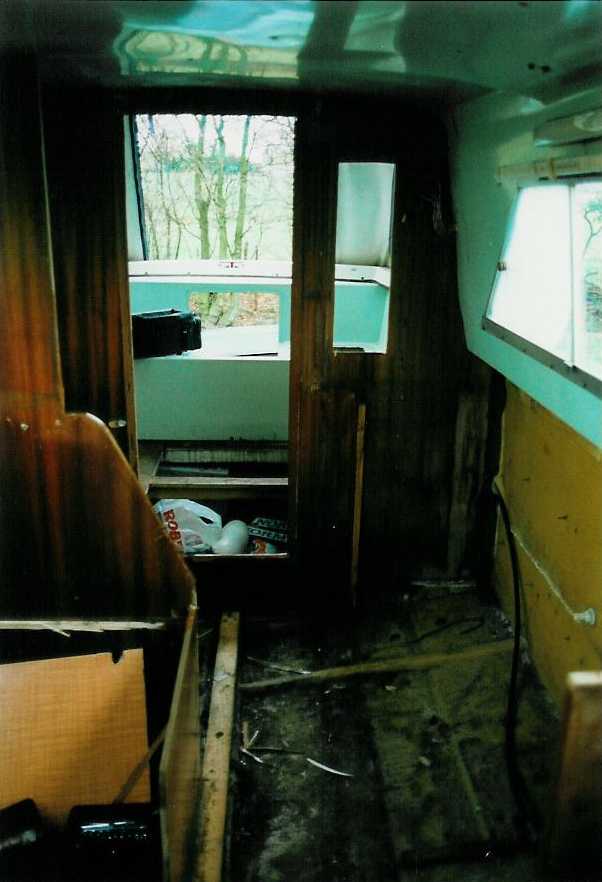
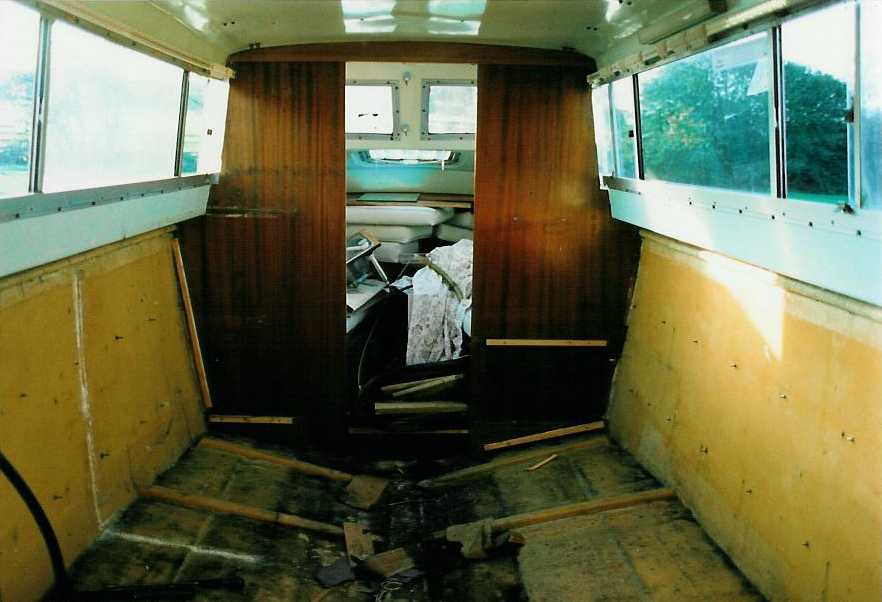
What we wanted to do was to extend the toilet compartment to enable a small shower to be in there as well. With the Norman being left hand drive, enlarging the toilet would mean the cabin door being pushed over to the left, just where the steering is. I don’t know why at the time I didn’t just think of making her right hand drive, but I thought the only way around our problem, was to mirror the cabin interior, a strip out and rebuild job! I had by now looked around the more expensive Atlanta 24’s and liked their layout. Also, the Viking range is on a ‘standard’ layout, so, we decided to gut the interior and build from new! I didn’t think it would be too expensive, how wrong I was.
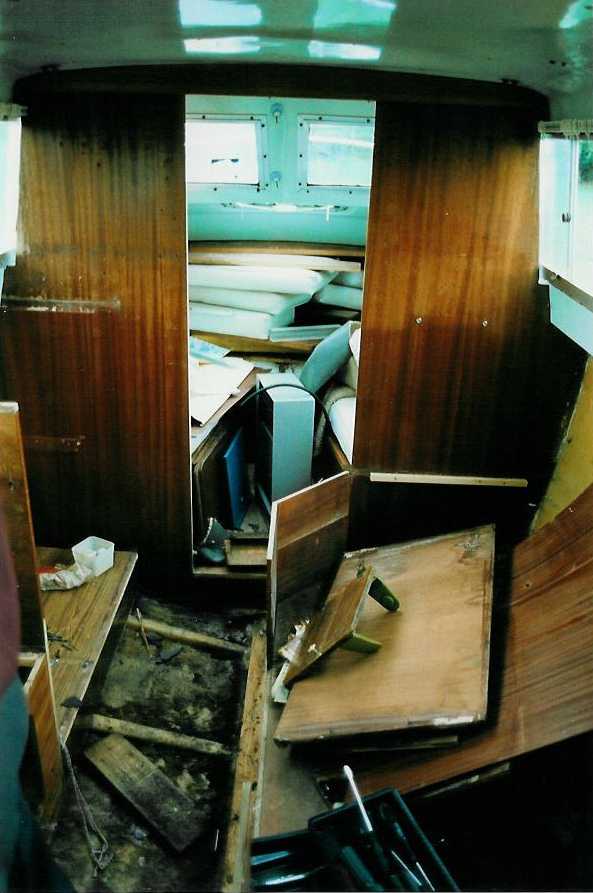
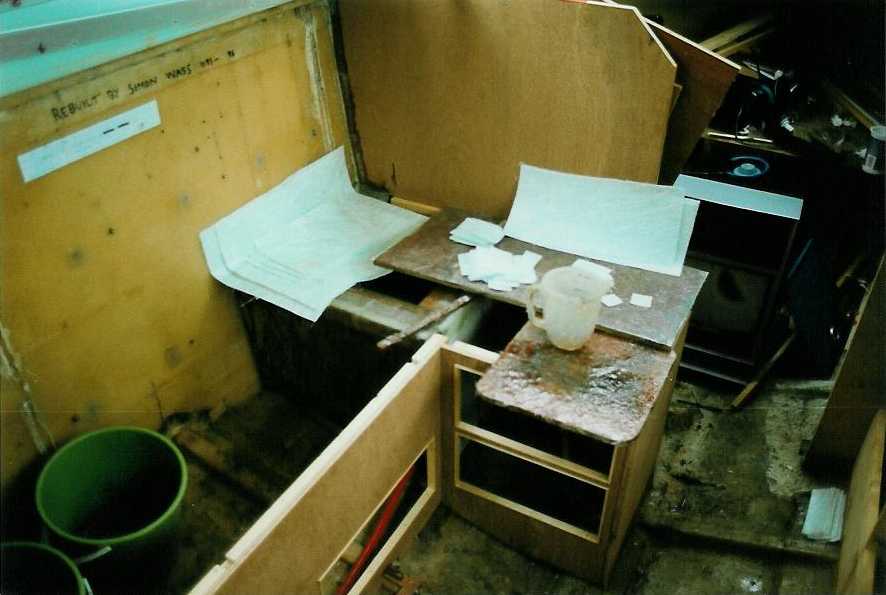
We quickly started to unscrew her apart, nearly everything was held together with brass woodscrews, which were all salvaged. All the ply was saved and quite a lot of the 1/2" stuff was reused somehow, mainly for fibreglass water tank carcasses, building the battery box, etc. I advertised all the white vinyl cushions, lining material, sink, etc, in the local Admag. Everything was priced individually but I sold everything to someone who had a Norman 23’ on the Erewash. £60 for everything, their Skoda was crammed solid! Note the fancy brass hinges on the cabin door, which are now on the shower door. They are the only link to her past identity.
11
 12
12
 13
13
 15
15
 16
16
 18
18
 19
19
 21
21
 22
22
 24
24
 25
25

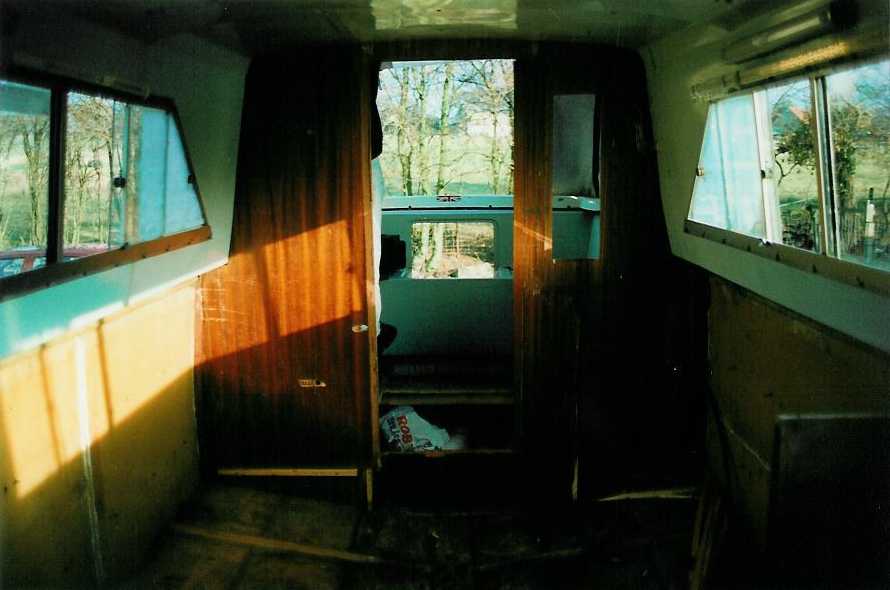
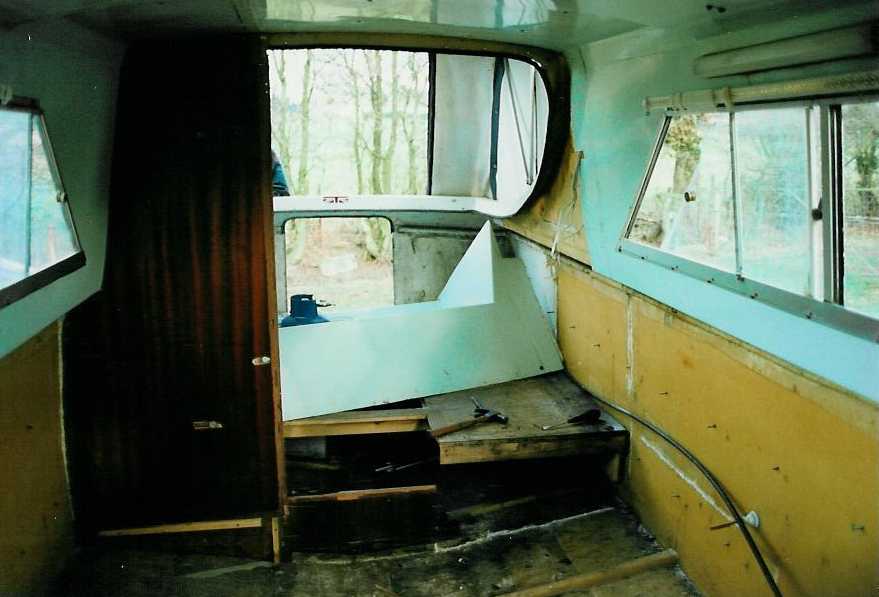
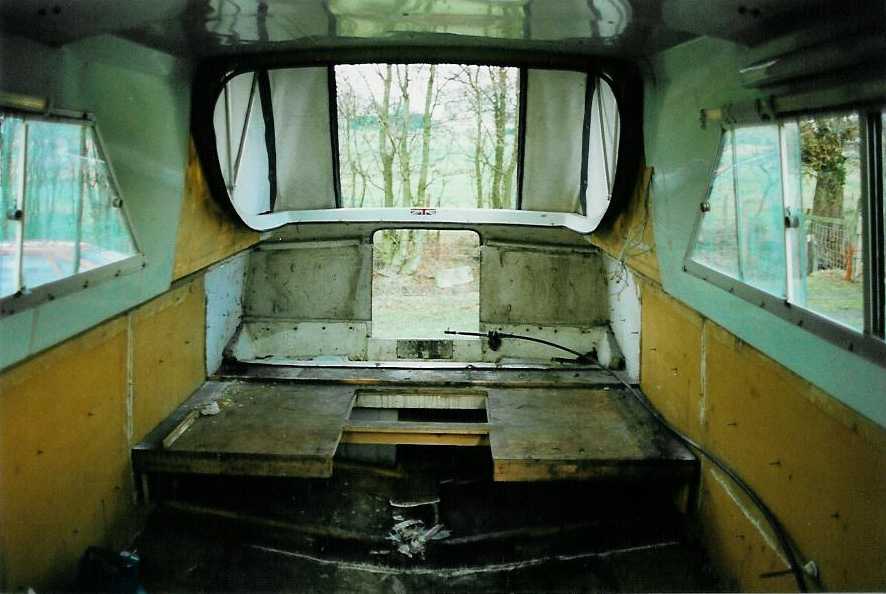
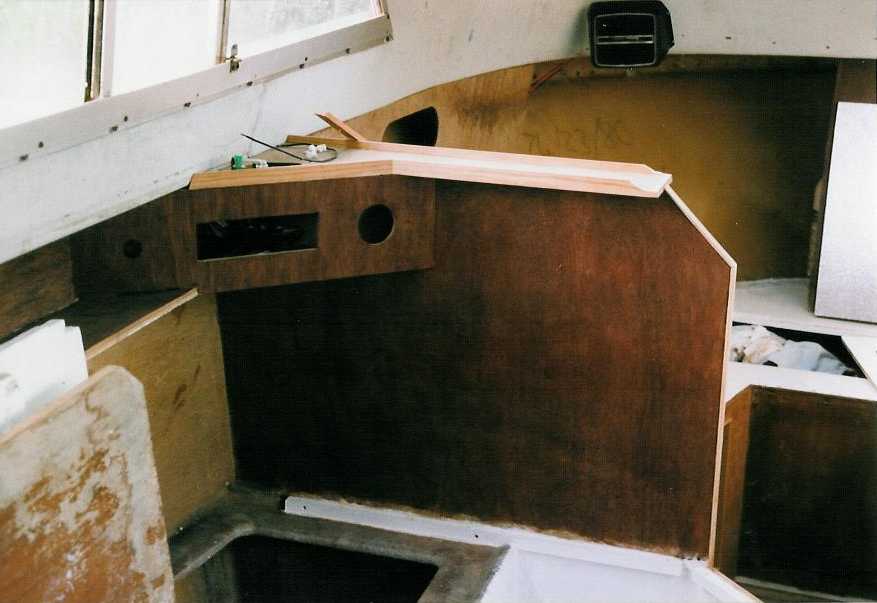
Once the shell was just that, an empty shell, I started to make detailed measurements to work out the new layout. For the new rear bulkhead, I constructed a framework and pinned pointers to follow the curves and corners. I then tied this to the roof of my car and brought it home. I then made templates for the bulkhead. For some reason I didn’t think of just using the old bulkheads? I spent about a month working out the new layout. I bought the shower tray and the pump out toilet to make sure they would fit into their planned space. This decided on the size of the shower/toilet compartment, and the rest followed.
27
 28
28
 29
29

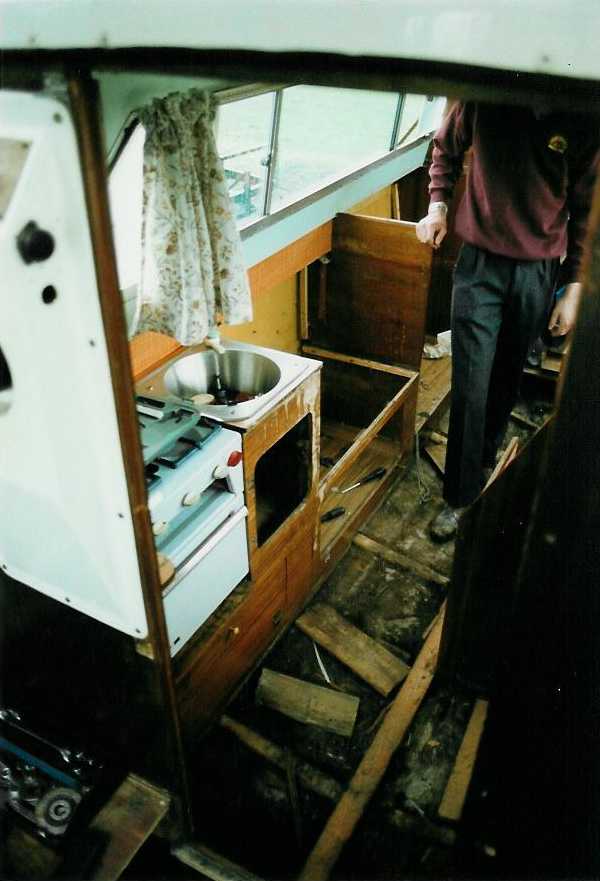
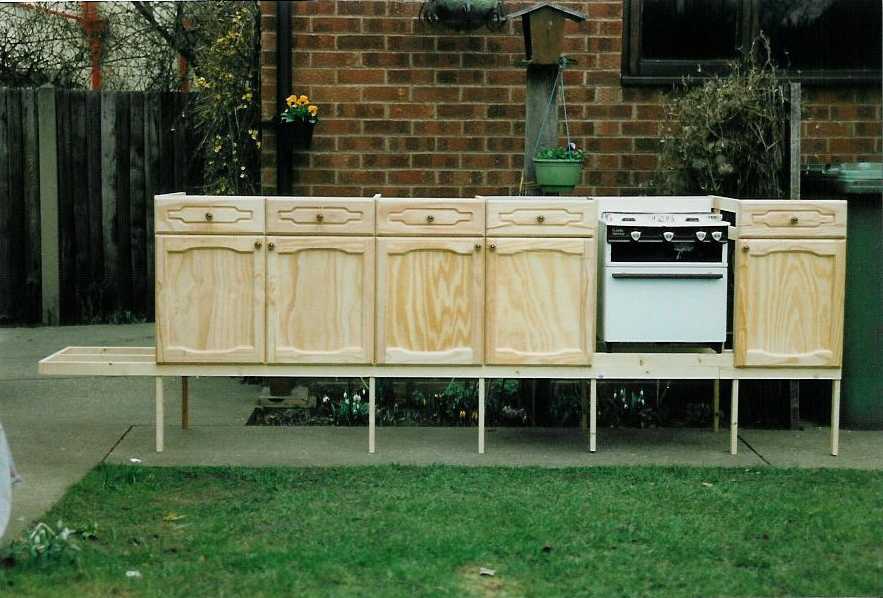
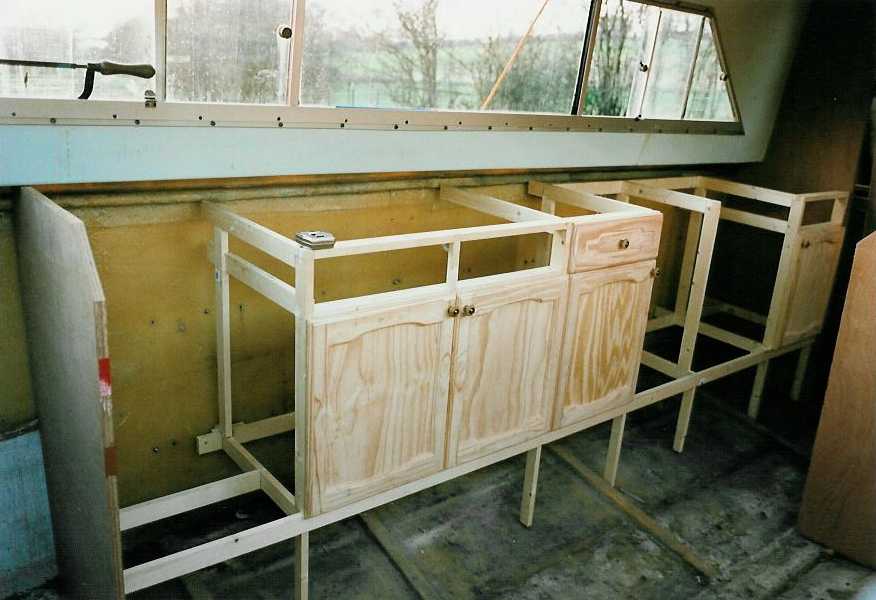
I bought the cupboard doors from Texas DIY, I knew roughly how big I wanted them to be and found some 15” x 18” cupboard doors with matching 15” x 5” drawer fronts. In the Admag I found someone selling a gas heater, cooker and fridge. He was breaking his caravan up after an uninsured accident. £40 for the lot with a 15kg gas bottle thrown in. The fridge was an RM122 which decided on the width within the cupboards, fortunately just less than the 15” width of the doors from Texas DIY. Also the RM122 is 23” high, the same as the total height of the doors! Talk about lucky. The cooker is a Vanessa, and is like new.
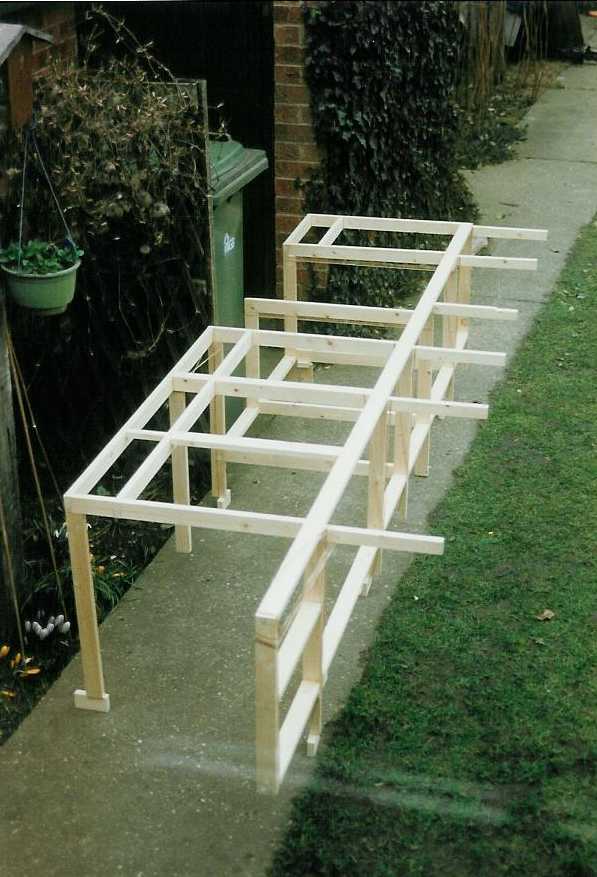
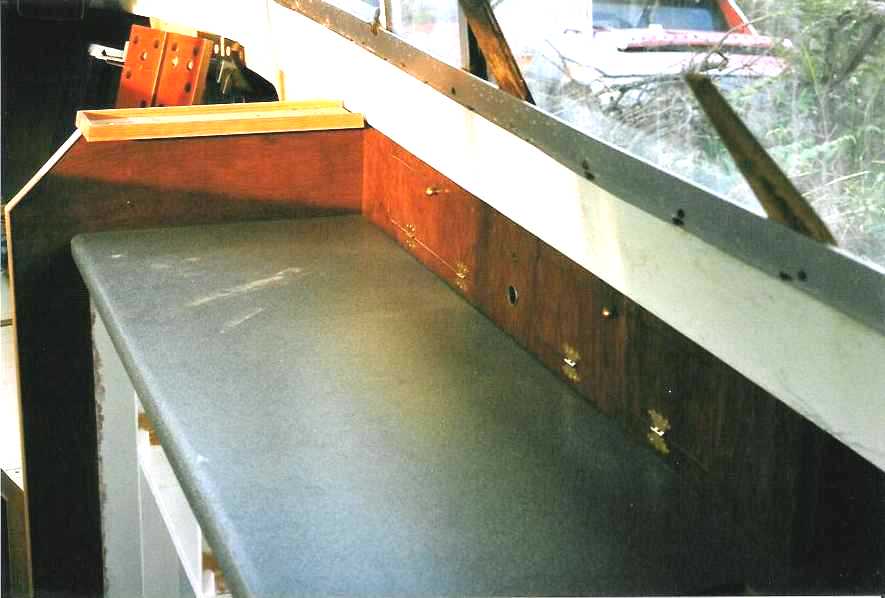
I bought WBP ply from Wickes and used 3 8’x4’ sheets of 3/4”, 2 sheets of 1/2”, 1 sheet of 3/8” and 2 sheets of 1/4". All were a nice red colour with a good grain and have stained well. Many an hour was spent working out the cutting pattern and eventually I had, bulkheads, seating, drawers, cupboards and some lining cut out. I managed to have the grain running the same way on all panels for continuity. The 3/4" ply was for the bulkheads, the 1/2" for the seating and shower unit, the 3/8” for the cupboard lining and drawer carcases and the 1/4" was used for the hull lining. I designed the framework for the cupboards that are under the worktop, and built them from more timber from Wickes. I did make a drastic mistake though and had to build them again! I drew a water tank under the cupboards to use what would be wasted space, with the advantage that two sides were already fibreglass.
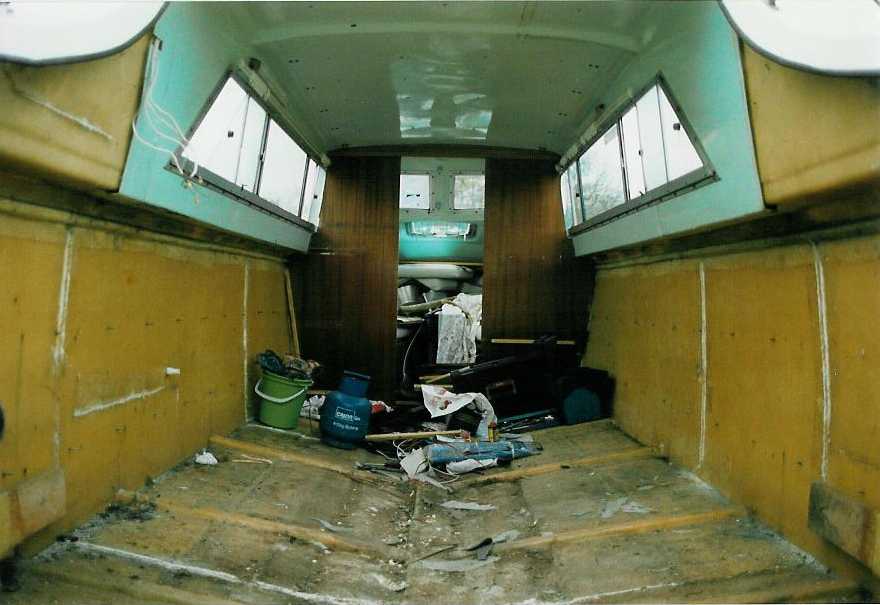
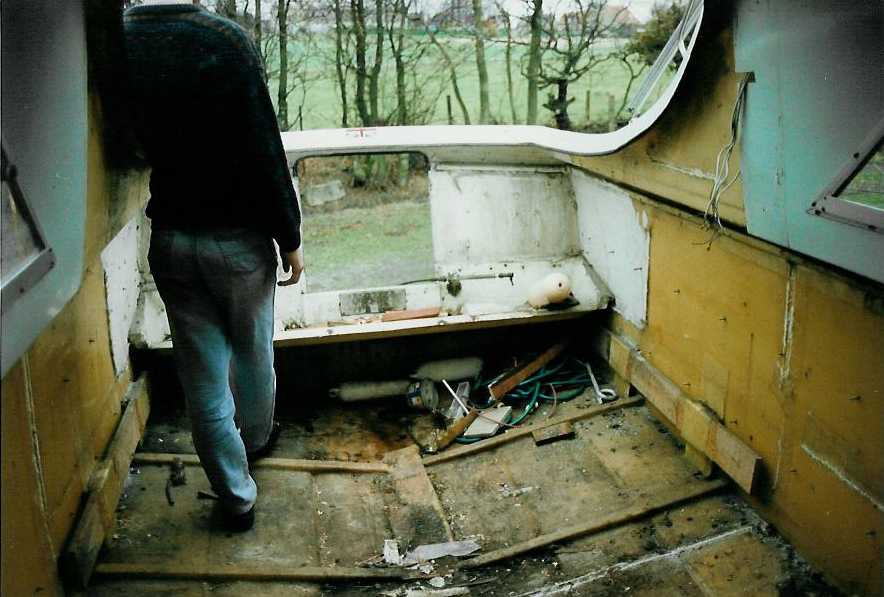
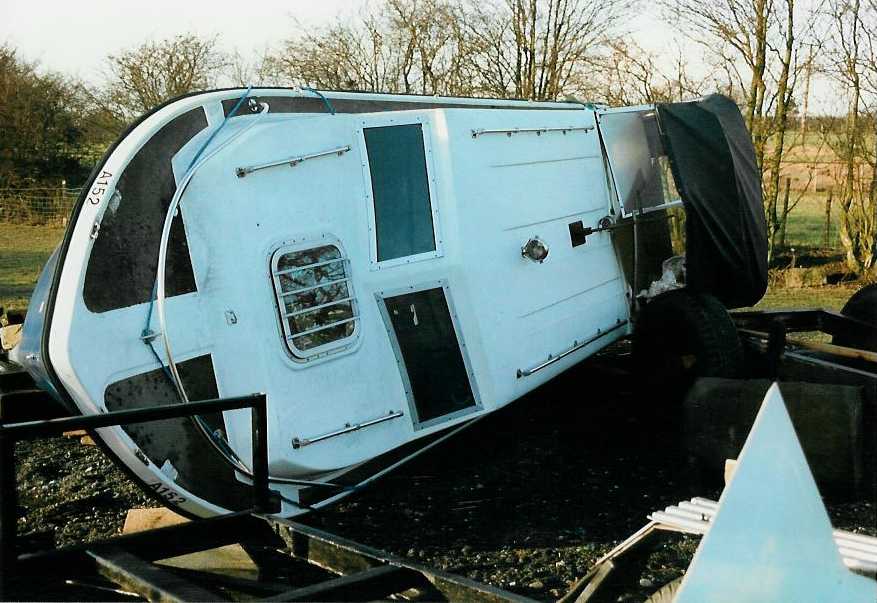
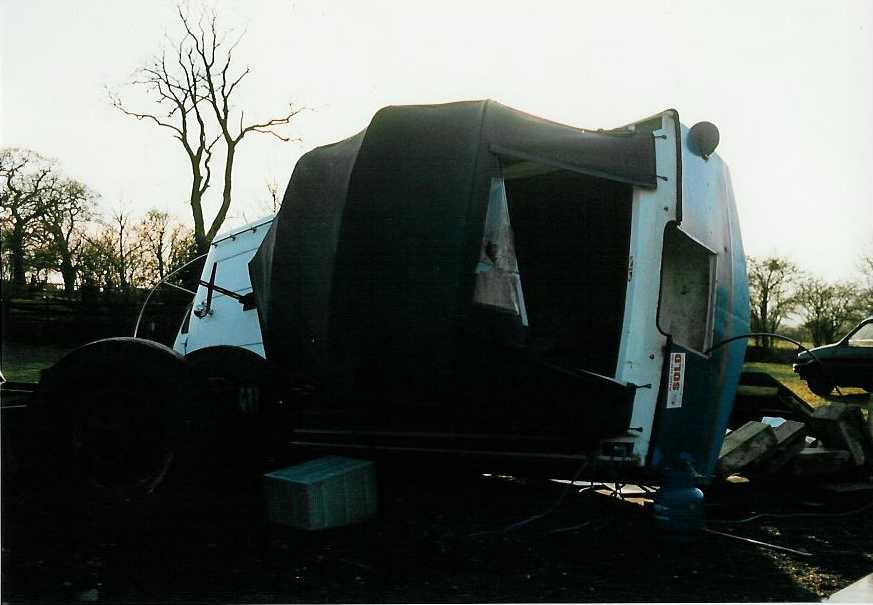
The February winds managed to push her off the supporting blocks, I guess the empty shell is quite light. The landing spot was unfortunately on the corner of a farm trailer. Some damage was done to the canopy and the cockpit windows, no glass broke but the frames bent a little and the screws were ripped out from the superstructure. All was easily fixed. We pushed and pulled the shell to remove stuff from underneath and manoeuvred her back upright. The next day she was back on blocks and the hull levelled.
 31
31
 32
32
33
 34
34
I managed to fit the new bulkheads in my Metro and trial fitted them, perfect fit! I planned to have every bit of woodwork removable, except the bulkheads. I assembled everything dry in the empty shell and once I was happy, fibre glassed the bulkheads in place.
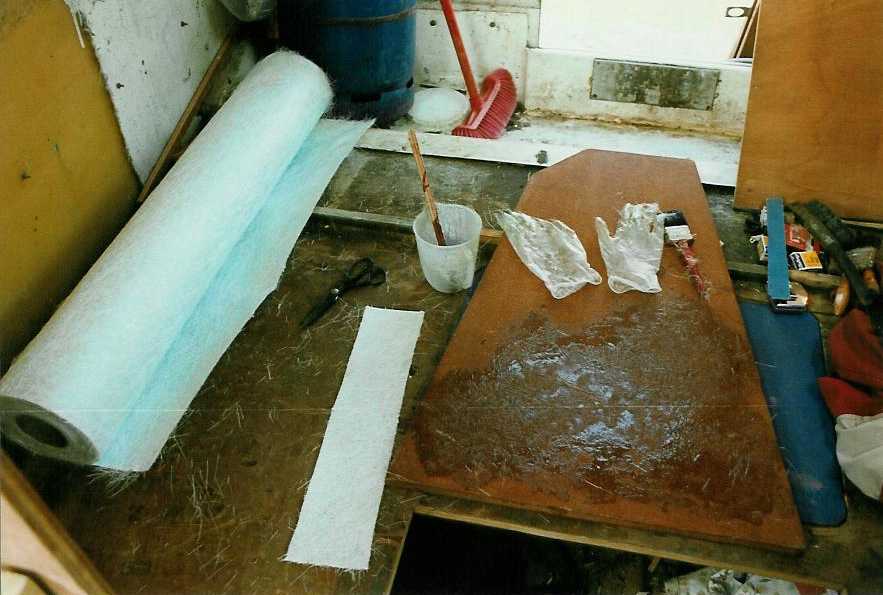
I had never done any fibre glassing before, so did some reading up. A local grp laminator advertised the basic materials, and I spent £120 on about 20kg resin, a big roll of matting and some gel coat and wax additive for the finish coat for the water tanks. I did end up buying some more from another local supplier at about £2/kg for resin and matting, normal price was about £5.
 36
36
 37
37
38
 39
39
 40
40

 47
47
 58
58
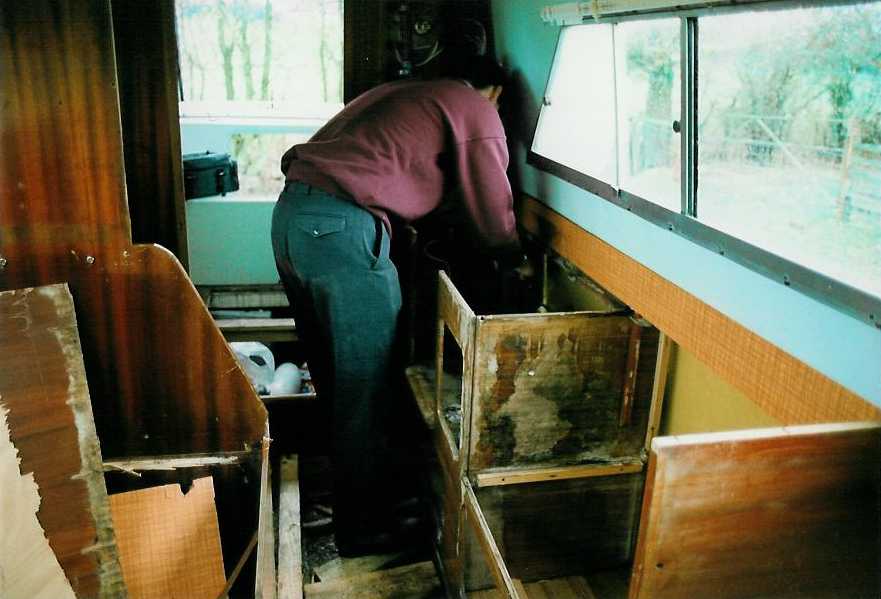
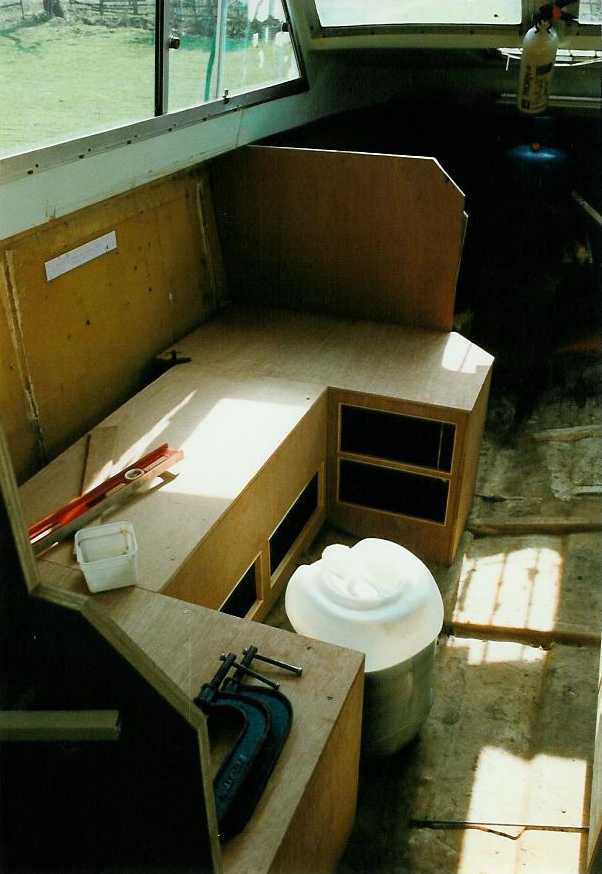
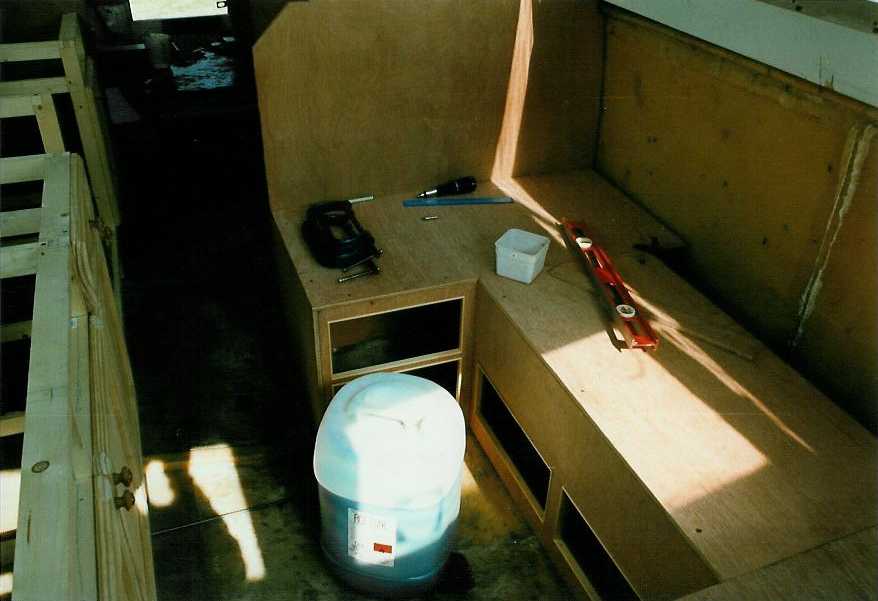
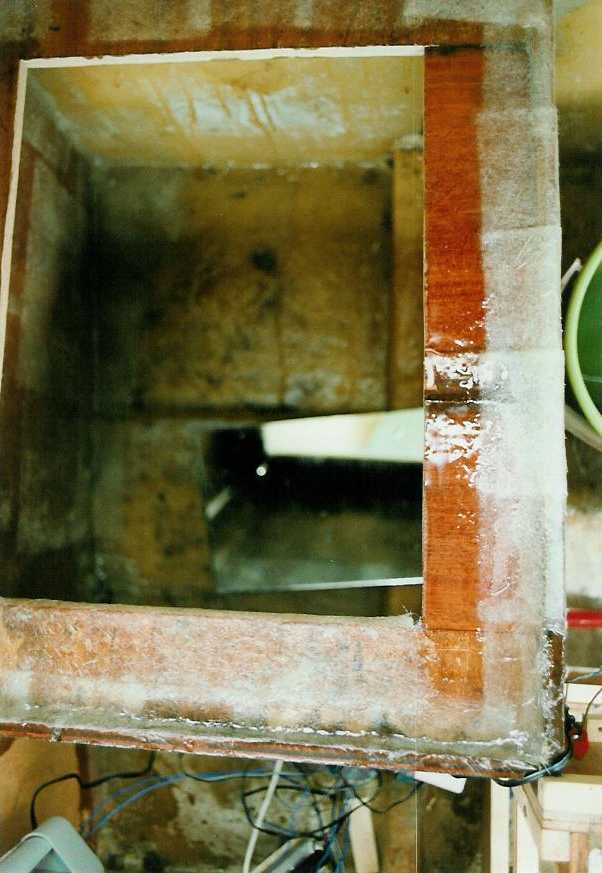
The next day, all the resin had run out of the matting, in my excitement I had used 1:1000 catalyst ratio, not 1:100! A correct mix was made up, and 1 hour later the bulkheads were fixed in place. I then levelled the cupboard framework and glassed it into place. Now for another mistake. I knew I was going to have a water tank under the cupboards, and that I was going to have removable lids everywhere, but I should have done the top of the tank with the framework out of the boat, upside down. Now I had to use a mirror to see where I was putting the wetted out matting and gravity was working against me! Many angry words were spoken. I ended up using a timber support wrapped in Clingfilm to hold the matting in place. It took an age to finish that tank. As the seating for the table was going to be U shaped, with drawers on all sides, I now had unusable corners. To make use of the space, I put in more water tanks! I now have approximately 120 gallons of water capacity, very close to 50% each side. I did work out that fully laden she will sit 1.5 inches lower, but useful for the shower.
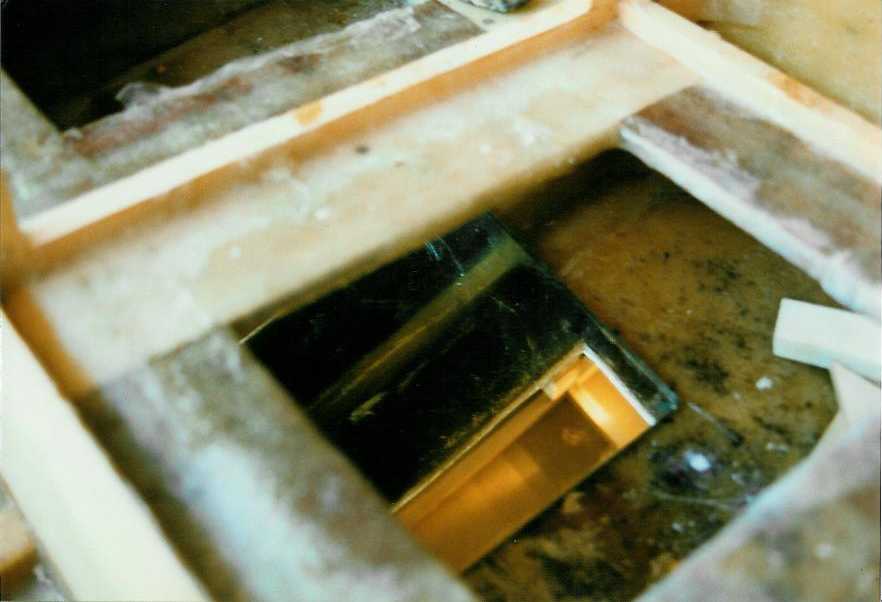
Later on, I fibre glassed a toilet holding tank under the gas bottle moulding at the back of the bilge. Instead of thinking about doing this tank while I had the cockpit floor out, I had to spend ages struggling through the hatch with resin and matting. I had to do it all using a small fluorescent light, and I could only just about lie on my side which was hard on my shoulder. I quickly got cramp in my free arm due to it always being held out doing the fibre glassing, just like the strongman challenge of holding your arms out for long periods of time. It hurts!
 49
49
 50
50
51
 52
52
 53
53

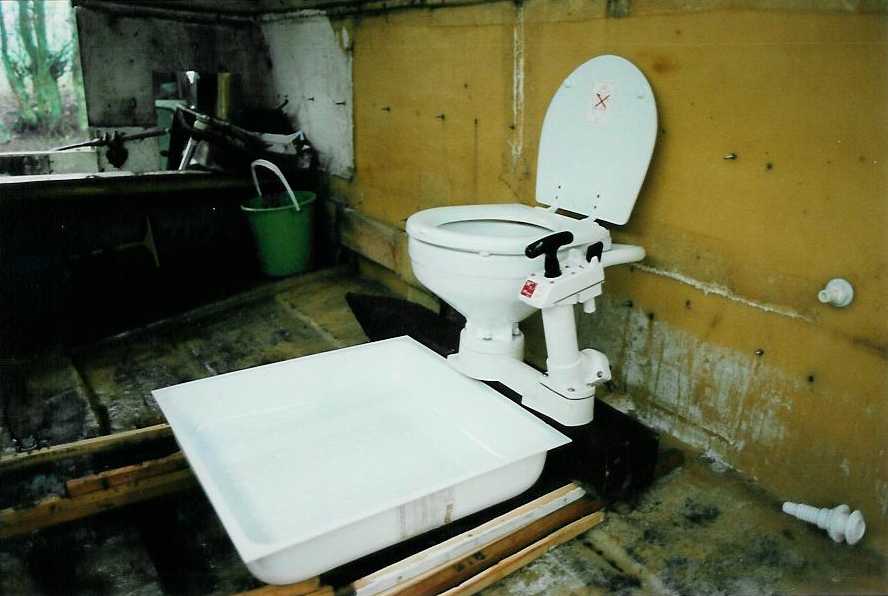
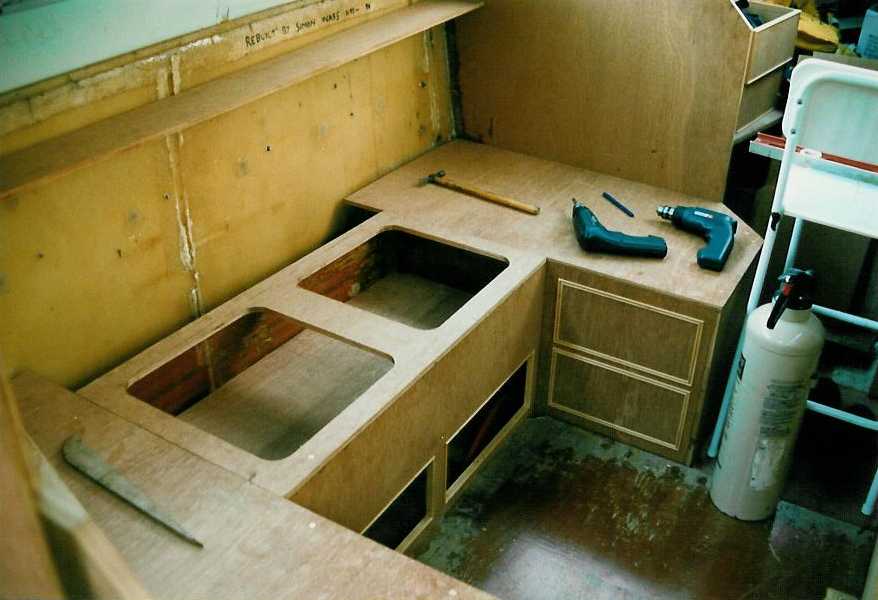
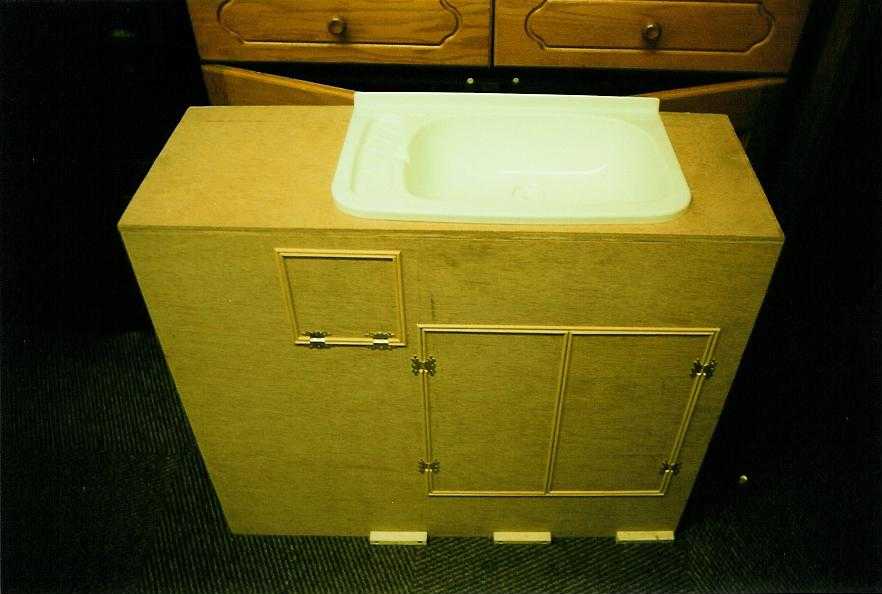
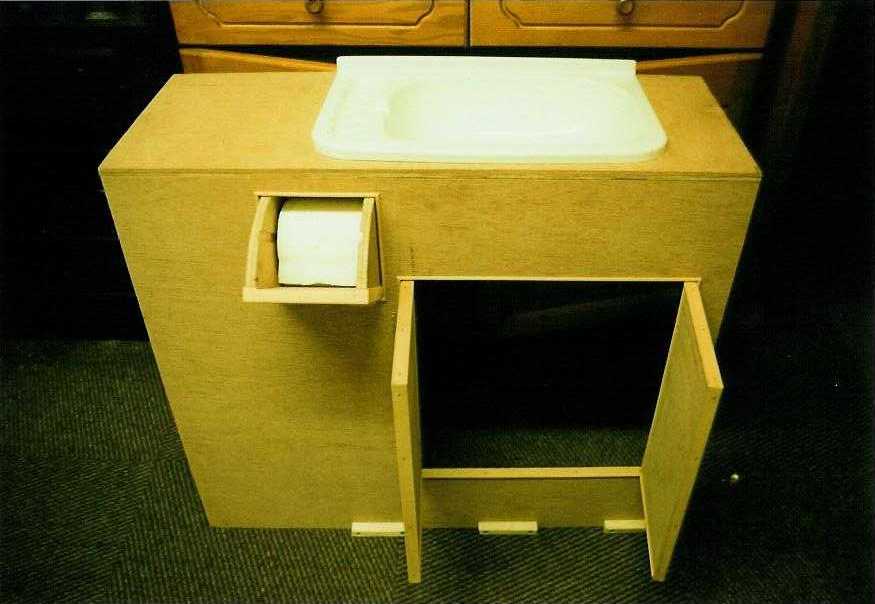
The shower unit was finished at home and fitted later, but I’ll have to see how long the varnish lasts in the damp shower cubicle. It’s a simple affair, a cheap caravan plastic sink, but with an expensive tap arrangement, a Whale Elegance, one of those where the tap head pulls out to make a shower head. The nozzle twists to a spray for a shower or to a jet for filling the sink. The toilet paper is housed in a pull down compartment to keep it dry, much better looking than the new plastic thing you can buy. The shower compartment was eventually lined with marble effect vinyl cushion floor material. It looks great! A few happy hours were spent applying the contact adhesive! The shower tray is emptied with a Gulper 220 pump switched from a push switch on the sink unit. I ought to have put a buffer tank in line but didn’t think. Note the drawings in the shower tray.
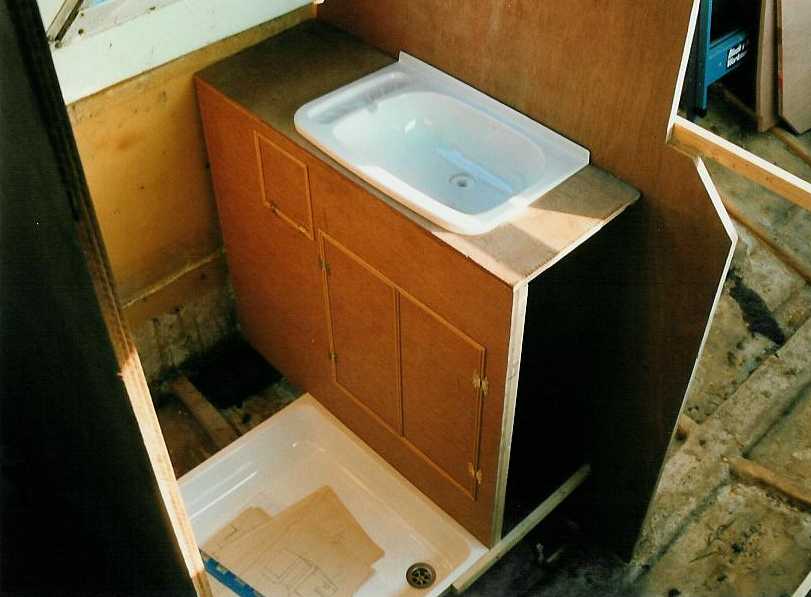
The toilet has to overlap the edge of the shower trap due to the lack of space. It is mounted on a board, which is in turn mounted to the bulkhead and the sink unit. It flexes a bit so I will have to rethink this somehow. It is flushed through a 3/4" skin fitting with canal water through a head-cleaning unit. There is also an other 3/4" skin fitting for flushing (cleaning) out the toilet. This is kept locked shut with a diverter valve that directs waste to the holding tank which has its own manual emptying pump mounted in the petrol locker on the stern.
 42
42
 43
43

 45
45
 57
57
The gas water heater, a Rinnai, is mounted on the rear bulkhead just like on Atlanta 24’s. It was about this time that I learned of the BSS. I now found that the fridge couldn’t run on gas, as the boat was to be petrol outboard powered. I did look into having a diesel outboard, but was put off by the possible vibration. I did find on for sale at £700, a good price.
The RM122 uses over 7 amps on 12v so I will get an Isotherm Cruise 49 litre model, it is the same width as the 122 but slightly lower. It will just fit depth wise. They only draw a couple of amps, very efficient compressor jobs. You can even power them with a solar panel, which I have 2 of. I got mine from RYD Marine, £35 for a 7watt model, the usual price from everywhere else is over £80. My 2 panels give about 1ah, doesn’t sound a lot but it all adds up.
A problem I had with the water heater was the exhausting arrangements. The flue ends up through the cabin roof inside the cockpit windows. A phone call to a marine surveyor confirmed this should be ok, so long as the correct type of vent was used. This was in ’96 so he probably didn’t know much about the BSS. Now the new rules say it should exhaust to atmosphere, there is no way it could comply without moving it to the front of the shower bulkhead. I emailed the technical dept at BW and I got a surprising reply, I can leave it as it is and still have a BSS certificate. I will just get a warning notice with it stating that it couldn’t be tested. All I have to do is keep the warning notice on the boat and the failure point here is only advisory for the BW license. The Rinnai has a microchip controller so even if the canopy fits air tight, which they don’t, it would shut down if the oxygen levels go too low.
I did all my own gas pipe work. Using Wade fittings couldn’t be simpler, the main mistake is tightening them too much. Half a turn is enough and I use a bit of CalorTite on final assembly. All the gas pipes run under the starboard side deck clipped to a timber rail that is fibre glassed in. I think the stipulation that an inline connector means the gas pipe was too short is a bit harsh, I had trouble routing a few. Some inline connectors would make assembly easier. The extra joints shouldn’t be a problem, as they all have to be gas tight anyway! The water heater should have a pump that can deliver 10 litres per minute, so I used a Whale Evenflow 1000. I have an accumulator tank to even out the flow from the pump and it seems to work. The frost got to it one winter and cracked it. I remembered to drain the water heater, but forgot about all the pipe work and pumps!
54
 55
55
 56
56

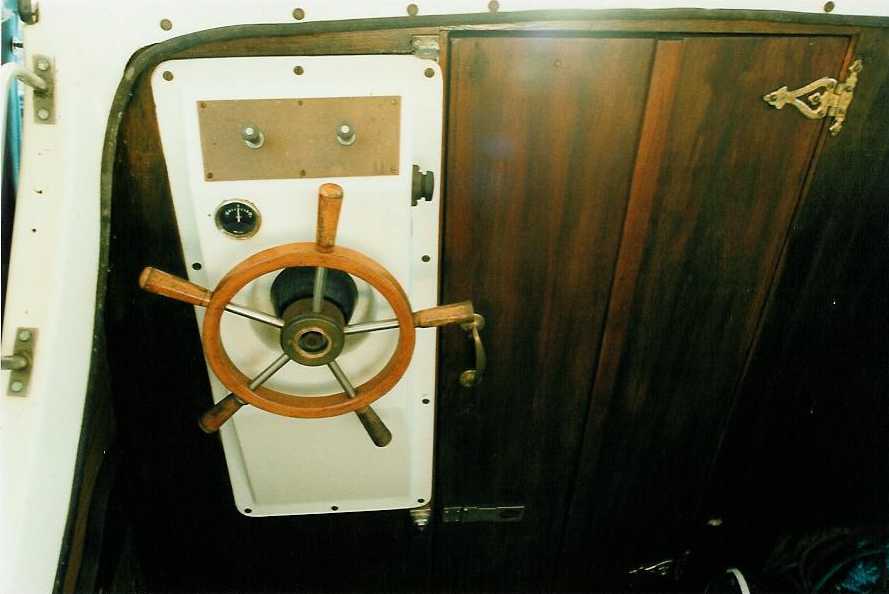
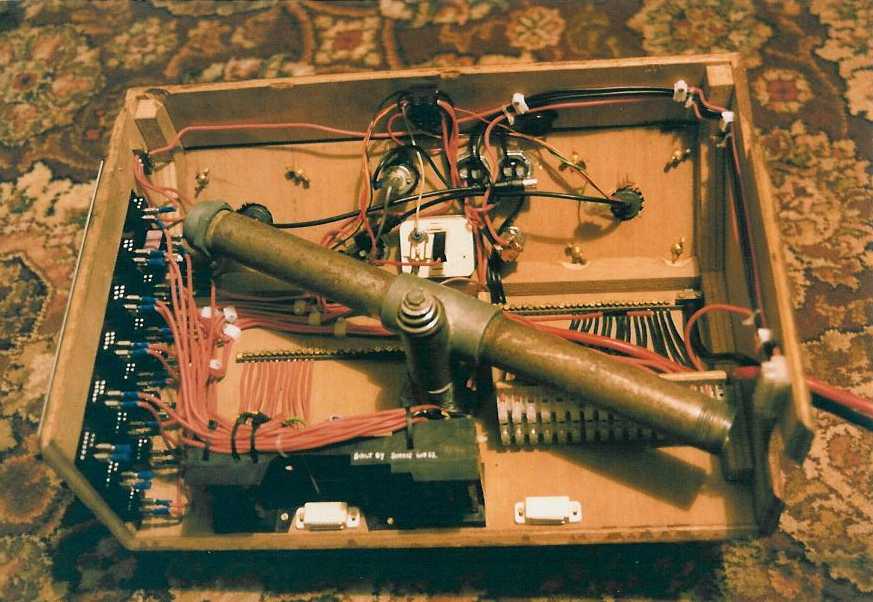
The old steering unit was reused but the cable was tight. I bought a new cable but had to make an adapter to get them to join together. The engine controls are on the panel on the cockpit side, I’m not happy with it, but there is nowhere else. I found this control unit in a locker when we bought her, the one in the cockpit was taken with the engine. I was going to complain to NBS but then I found a better one! The one taken was a twin lever unit, the one now fitted is a single gear/throttle handle.
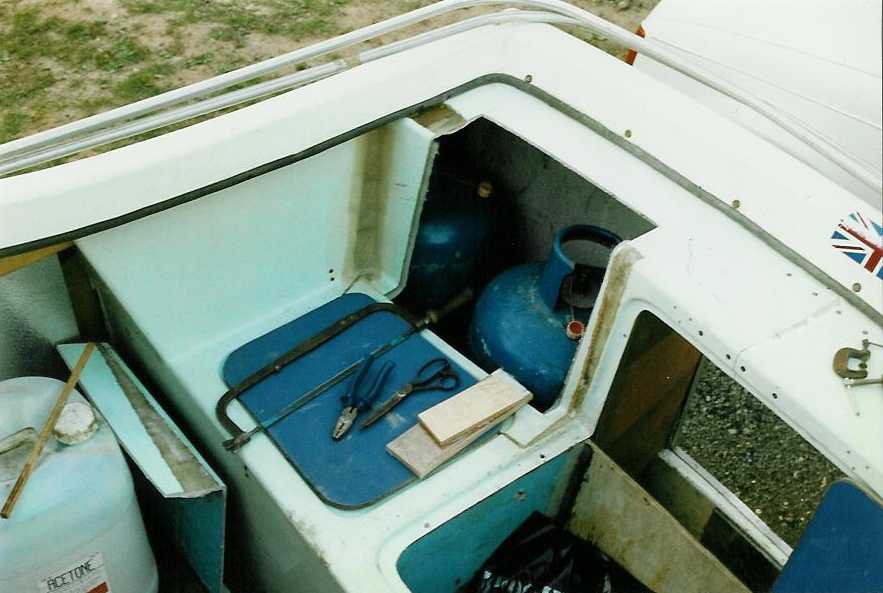
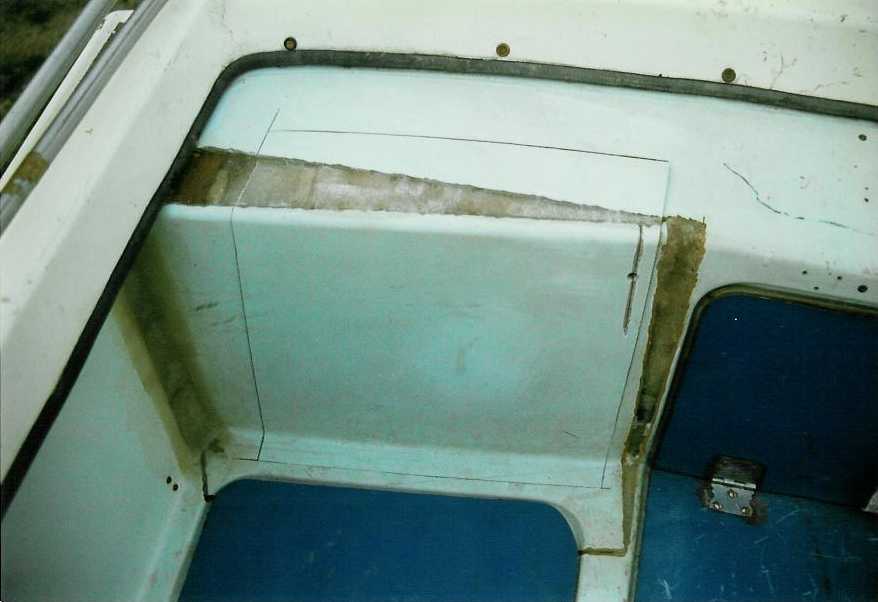
The cockpit seat moulding has been modified to allow 2 15kg gas bottles to fit. The moulding behind the seating has 2 supports for 4.5kg bottles but I wanted more capacity. The gas locker is to starboard, the petrol to port. Both have ply sides fibreglassed in to seal them from the engine. These panels will have to be coated with 5mm of fibreglass to comply with the BSS. The petrol tank is accessed through the lid in the seating and the gas bottles fit through a door cut into the back of the cockpit seat moulding. I might only use 4.5kg bottles as the regulator of a 15kg bottle will be above what I can guarantee as gas tight. The door does have a seal, but will an examiner allow it? Both the petrol and gas lockers have large stainless louvre vents at the lowest practical point. The battery locker has a vent at the top so any hydrogen gas from charging can escape.
The cockpit will be carpeted on all sides.
59
 60
60
 61
61

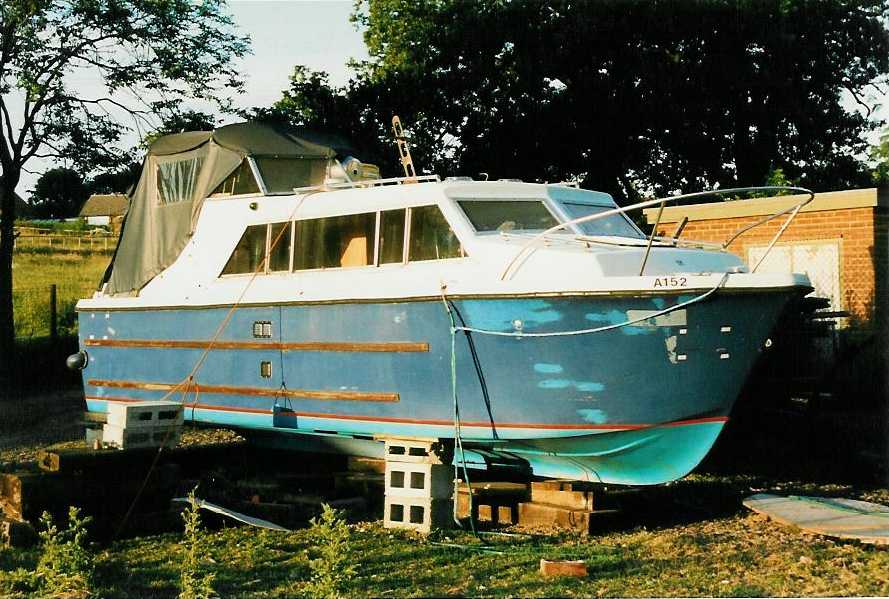
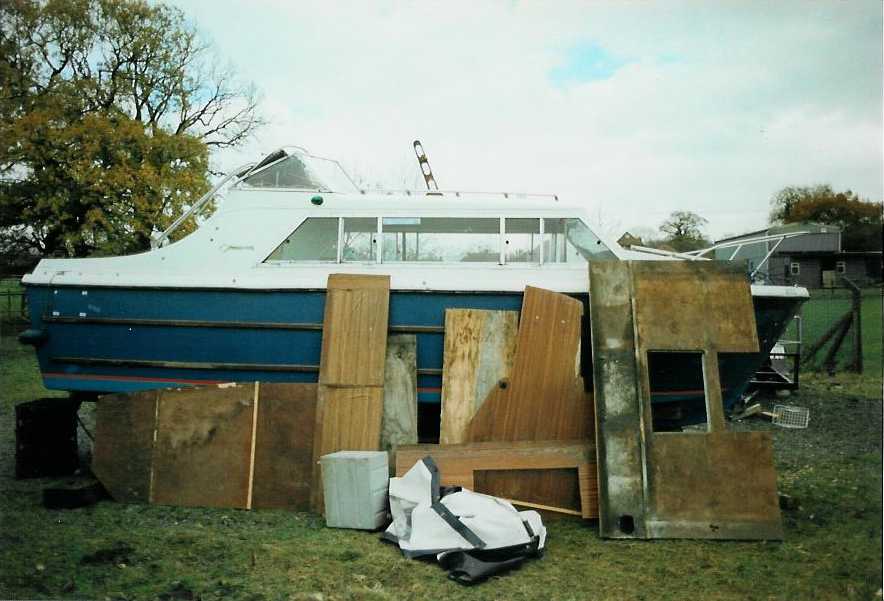
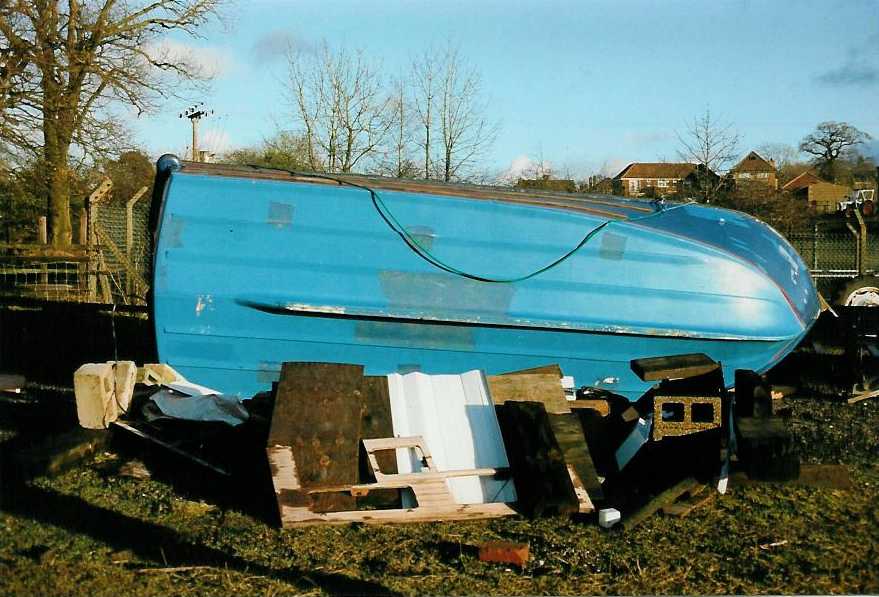
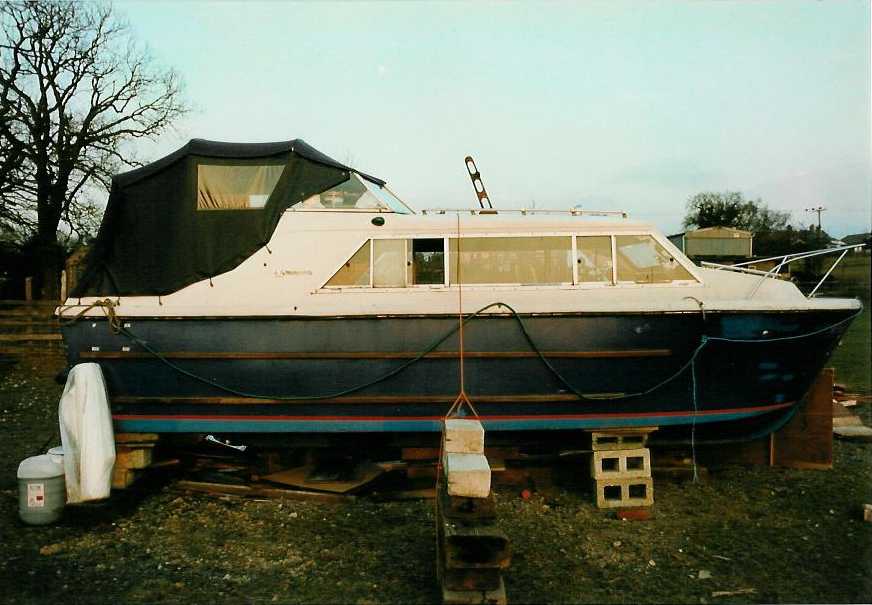
The hull was sanded back to gel coat and about 6 layers of paint were removed. We also found some of her old names. When we bought her the name Mary Anne of Pershore could be seen where stick on letters had been removed. In the paint, we found what I think is Mummy Ruffin, I’m sure it meant something to somebody! As I sanded the superstructure sides just forward of the front windows, I exposed Pappi-Rus. And finally in the gel coat of the hull at the back another name appeared where the sun had discoloured around the letters. I forget now what that name was. She is now called Snapdragon because as a kid, I would pull up any I found and take them home to plant them in the garden.
The paint we used was International Toplac. Very nice stuff it is too. Apply with brush or roller and it flows to a good finish. It’s supposed to stay glossy for over 5 years, and it certainly seems to be doing ok. I wonder if the waterline will be correct? Now that would be a good guess.
The hull inside is insulated with 3/4" polystyrene where possible behind 1/4" ply. This is then carpeted for warmth. The front berths have storage cubby holes behind a panel that runs from the turn of the superstructure under the side deck to the join of the hull and the top of the berth woodwork. This would normally be wasted space and is an idea I got from Belmore on the Broads. The front berths also have reading lights. Under these berths are 2 huge drawers, 2’ x 1’ x 18”.
All the exposed bulkheads and ply woodwork is stained and varnished with yacht varnish, I’ve lost count of the number of coats I’ve applied. The edging strips on shelves are varnished pine and the doorframes were machined by myself from American white oak. This gives a contrast to the mahogany stained woodwork.
None of the electrical wiring comes anywhere near the gas pipe. I ended up using well over 100m of red and black 2.5mm cable. All circuits have their own earth return going to a bus rail in the steering console. There are a total of 18 circuits with their own switch and fuse. I have made my own gas alarm using a published circuit that work fine, there is an automatic bilge pump and I also have installed a bilge blower that runs if the gas alarm detects anything. All have manual override. On a panel in the cockpit side behind a door, I have mounted the battery isolators. There is also a battery meter, engine charge meter and a current consumption meter. The engine, a Yamaha 9.9 4 stroke, gives out well over 10amps and charges the batteries through a split charge diode unit. I will have 3 75ah leisure batteries for the services and a car starter battery for engine start.
62
 63
63
 64
64

65
 66
66

Most of the above work was done in about 18 months, mainly the structural stuff. I know you could possibly do it quicker, but work gets in the way. Tibshelf was a 25 mile round trip so I would only go over if I had the full day spare.
I had a phone call from the now good personal friend, the smallholder. Unfortunately he was selling up to buy a nursery as he found he couldn’t trade from the smallholding. This meant I had to find somewhere new to put her. She wasn’t in a fit state for the water, I probably wouldn’t have got a certificate as she was then. Luckily when we first bought her, my mother mentioned to a work colleague about us buying a boat. He lived next door to some family friends, so we knew him, but not very well. He told my mother at the time that if he knew we’d bought a boat, we could have put her at the bottom of his garden, he has about 3/4 acre. A phone call later and we could move her there. I now had to arrange transport. I went to NBS to see if I could hire a trailer, but no luck. They recommended someone from Sheffield and we got her shifted.
Since then I have done the wiring, all the staining and varnishing, gel coated the water tanks and built the toilet holding. Not much to show for 6 years. I did move jobs, I got an apprenticeship and had long periods away in digs whilst doing my training, and I sort of lost interest even though it was now just an 8 mile round trip.
My interest is now at 100% mainly due to the Norman Boats Appreciation Society. A big thank you for Trevor for getting Normans on the web.
I have now repainted the superstructure and now thinking of the antifoul. I’m going to use one of the long lasting copper/epoxy coatings. £60 per litre but it should last 10 years plus. A lift out every 2-3 years for a quick scrub should be enough, a saving on lift out fees.
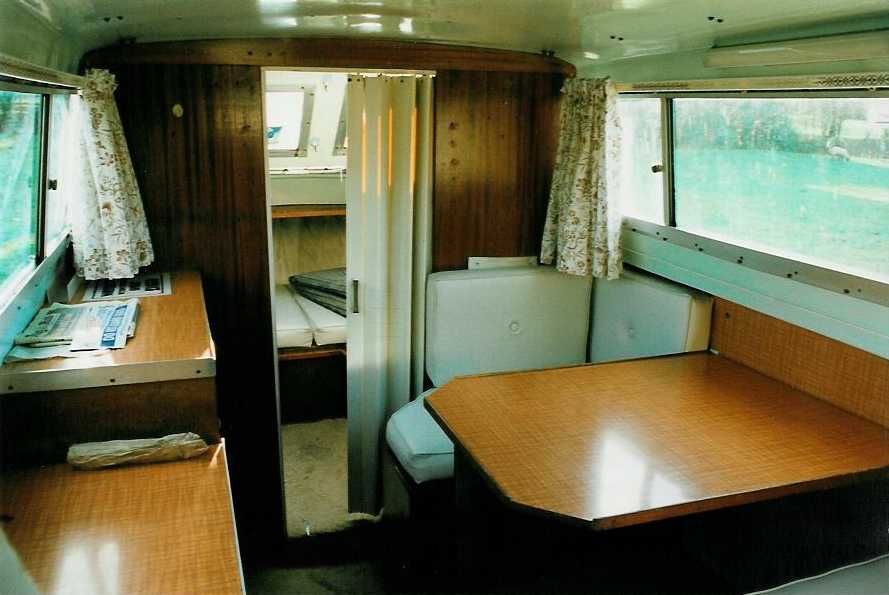
All the little jobs now need doing, all the ones I’ve been putting off. The cooker and heater will get fancy aluminium surrounds for neatness, the curtains need hanging properly, I’m not happy with the present curtain rail, I might make a pelmet box to hide it. The seating cushion fiddle strips need fixing and an infill making for converting the seating into a double bed, all 40” of available width. I’d call it cosy! The 2 v-berths are about 2” shorter to fit everything in on the new layout. They are just short of 6 foot.
The seat cushions, lined velour curtains and pelmets were made by the Caravan seat cover centre at Bristol. I had the foam delivered and cut it to size. I then sent it back to Bristol for the covers to be made and fitted. Sending measurements for some of the cushions would have been impossible, especially the v-berth ones. All this came to well over £500, fire proof foam, covers and curtains don’t come cheap!
All the aluminium window frames are starting to corrode, not too bad at the moment, but I’m going to paint them all in satin black Hammerite. I’ve had to replace a front window as it was perspex and was starting to craze. It now has toughened glass and black frames, it looks very nice, sort of modernish! All new powerboats have black window frames! I’m rebuilding the cockpit windows too, some were damaged when the wind blew her over, and I’m trying to arrange them to hinge and be removable. The front 2 were again Perspex than needed replacing. These are now laminated glass with holes drilled through for the canopy fixings. The steerer’s side screen is fitted with a windscreen wiper drilled through the glass. There is a push button near the engine control for a single wipe, or it can be switched to continuous. I also need a new canopy so will be making use of Gary’s generous offer of a discount for us ‘club’ members. The support frame for the canopy is going to be changed for a stainless one, and I’m making a ‘bathing’ platform. This is mainly to protect the engine, outboards are somewhat vulnerable stuck out at the back. I just hope I don’t get charged for 2 foot extra at the marina!
Some of the woodwork has shrunk a little, including the bulkheads, which I’m annoyed about. Surely WBP ply shouldn’t shrink? It’s not the proper marine stuff, but still WBP. I’m also hoping the hull hasn’t distorted, over 7 years stood on blocks. Some of the movement internally could suggest she has sagged a little which will be reversed the first time she is floated. Hopefully the water tanks won’t get damaged. I can’t wait until the day I do see her floating, I just hope everything goes ok. There are only 4 holes through the hull, 2 for the toilet, and the speed log and depth transducers. So long as they don’t leak, it’ll be ok.
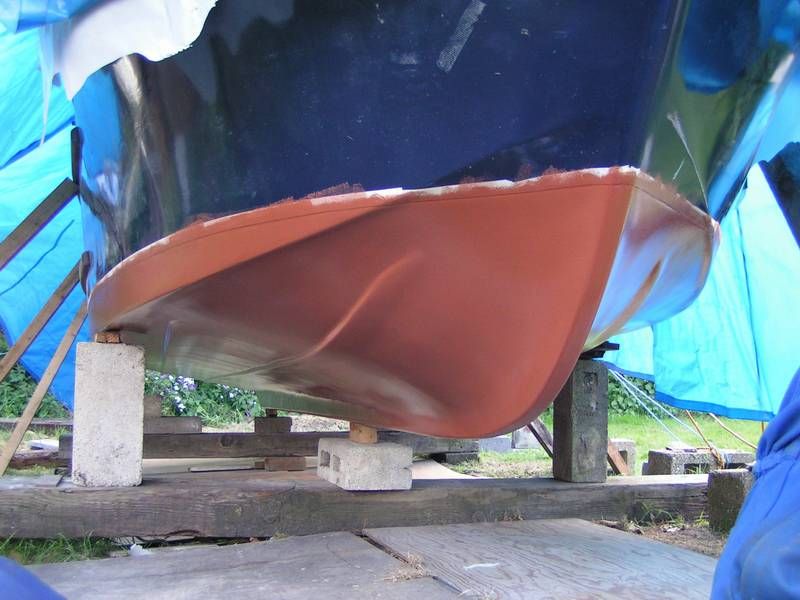
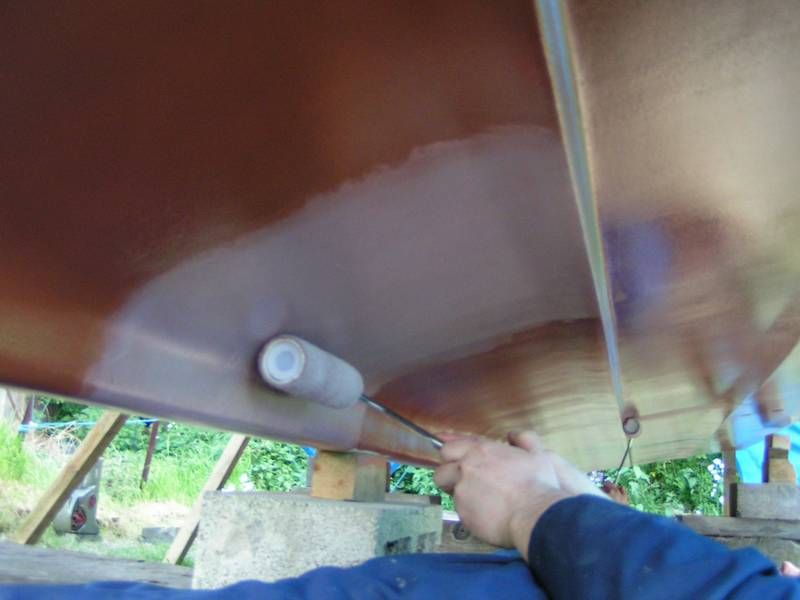
The Coppercoat is nice stuff to put on, 500ml white resin (consistency of thick custard), 500ml hardener (quite thin) + 2kg copper powder, all mixed together. It goes on nice with a short pile roller, almost like rollering emulsion. Notice how pic 67 shows the stuff as pink, after a minute or 2 it goes brown so it is very easy to see where you've been. 4 coats later and Snapdragon has a copper bottom! The sales stuff claims 4m sq per pack using 4 coats, a 23 (waterline length of 21') works out at just over 16m sq. Amazingly we were down to the last roller full doing the last bit, perfect, no waste or thin bits. Very pleased, a substantial bit of progress. No more laying under her, ever again?
67
 68
68